Using a Vapcap
1) Break your new Vapcap down and give it a quick clean.
It will already be spick & span, but you’re about to inhale though it so there’s no harm in getting to know your new unit and giving it a quick “insurance clean” at the same time. – See below for easy instructions.
2) Next, grind your botanicals to a medium grind.
Try not to fill your botanicals right to the top of the chamber (easier said than done), else the hot air won’t be able to work it’s convection-magic quite so well. Most people tend to either use the “suck like a straw” or “push and smoosh” method.
Alternatively, just break a tiny bit of botanical off and stick it strait in the herb chamber, which arguably works just as well.
3) Time to heat things up a little.
Ideally; You’ll want either a small single-flame torch lighter filled with purified butane or an induction heater.
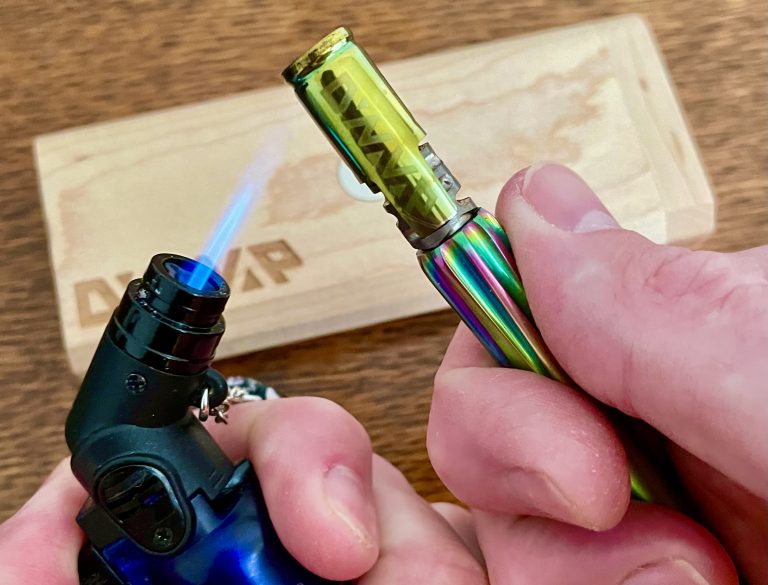
Spinning your Vapcap with your thumb and index-finger as it kind of lays on your palm, put your knuckles together for stability and point your flame slightly towards the top of your Cap.
If you’ve never done this before, it’s worth practicing without a flame first, just to get used to the process.

4) Pay attention when heating your Cap.
It will “CLICK!” to advise you to stop heating.
“RESPECT THE CLICK!”
At this point you’re in no danger of combusting your botanicals, and any tasty terpenes present will be showcased.
To take a draw, simply cover your Vapcap’s airports and inhale for a few seconds before fully opening the airports while you breathe in. – This process can be played with to find the perfect tailored technique for you.
NB: You might not see any vapour when you exhale at low temperatures, but you’ll taste it!
5) Lastly; Your Cap will “CLICK!” again as it cools to let you know that you can apply more heat when you’re ready.
“RESPECT THE CLICK!”
And that’s it. You’re a legend.
When you do next start to heat again, move the flame down to the middle of the Cap, still rotating your Vapcap.
For the third heat up, move the flame right down to the bottom of your Cap/herb-chamber, adding the most amount of heat to the Tip before the disc’s at the top of the Cap get hot and “CLICK!” again.
– You may well find that, in time, you’ll end up doing the exact reverse of this process, especially when using a steel Tip. And then once you’re used to the process you can start bravely pushing past the “CLICK!” (by no more than a few seconds), giving you denser clouds.
After a few hits you’ll notice that your botanicals have turned pale or gone brown and have lost/changed their flavour.
Some people like to live on the edge and take things right to the edge of combustion, and the botanicals would then look very dark.
This stuff is called ABV (“already been vaped”).
Those using THC products often store this to use later, in food, drinks, oils, etc as it still has beneficial properties.
And that’s about all you need to know before you launch yourself into the Dynaverse.
There’s going to be a learning curve, but it’ll be interesting and fun…
Knowing your botanical’s properties.
How you pack the chamber.
Which Tip you use.
How long you heat your Vapcap for.
The tools you use to heat it with.
How you draw air through the unit…
… The list goes on, but it’s all good fun.
When it comes to cleaning, use iso-alcohol and a cotton-bud and/or a clear tube, etc…)
(Never touch wood products with iso)
Take your Vapcap apart (ideally, remove your rubber O-rings, or risk them perishing).
Put all metal parts in a container, pour in a little iso and agitate. Leave aside in the iso for 30 minutes and shake occasionally, and empty the iso out.
Fill a cup with soapy water, tip a little in to the container and shake.
Remove, fill, shake, repeat.
Fill with clean water, shake, repeat.
Leave parts to dry on a paper towel.
… Sorted!

